Chapter 19: Using Nginx Proxy Manager with a Network Load Balancer
If you’re behind a Network Load Balancer (NLB) and want to manage SSL certificates and reverse proxying with ease, Nginx Proxy Manager (NPM) is a powerful web-based tool that simplifies the process. In this chapter, you’ll learn how to:
- Upload your SSL certificate manually.
- Set up a Proxy Host for your website.
Important Notes
- Your DNS must have an A record pointing to the public IP address of the Network Load Balancer.
- Port 443 (HTTPS) must be open to the internet to allow secure access to your site through the Load Balancer.
Step 1: Add the SSL Certificate (Custom)
- Access Nginx Proxy Manager in your browser.
Example:http://<your-npm-ip>:81 - Log in with your admin credentials.
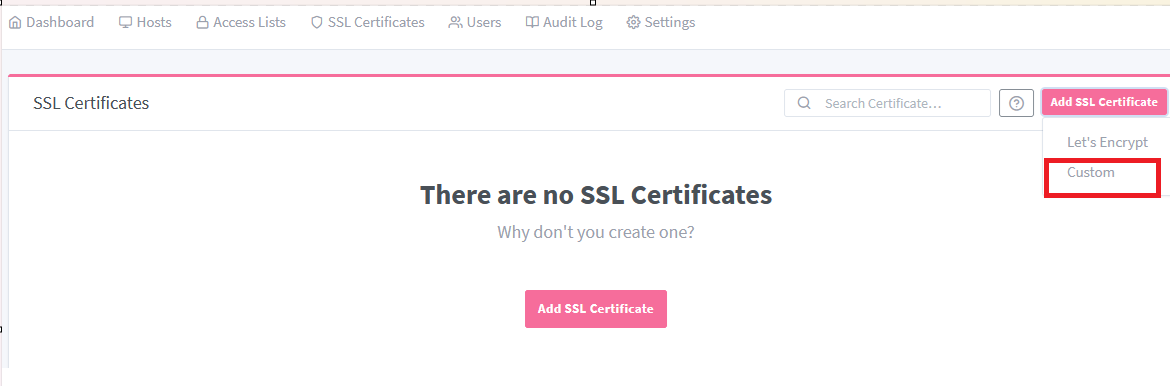
- Go to SSL Certificates tab.
- Click "Add SSL Certificate" → Select "Custom".
- Fill in the fields:
Name: Something descriptive likehexacats.cloud
Certificate Key: Paste the contents of/etc/letsencrypt/live/hexacats.cloud/privkey.pem
Certificate: Paste the contents of/etc/letsencrypt/live/hexacats.cloud/cert.pem
Intermediate Certificate: Paste the contents of
/etc/letsencrypt/live/hexacats.cloud/chain.pem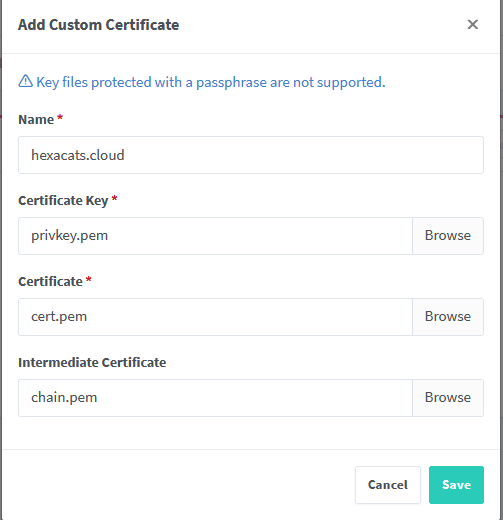
Click Save.Step 2: Create a Proxy Host
- Go to the "Proxy Hosts" tab.
- Click "Add Proxy Host".
- Fill in the details:
- Domain Names: e.g.,
hexacats.cloud,www.hexacats.cloud - Forward Hostname / IP: the internal IP or DNS of your app container (or backend from NLB)
- Forward Port:
8080(or the port your app uses)
- Domain Names: e.g.,
- Toggle "Block Common Exploits" (recommended)
- Under SSL tab:
- Check "Enable SSL"
- Select your custom certificate from the dropdown
- Check "Force SSL" and optionally "HTTP/2 Support"
- Click Save.
Now, your domain is:
- SSL-secured
- Reverse-proxied through Nginx Proxy Manager
- Compatible with backend services and Network Load Balancers.
